GENERAL DESCRIPTION
In order to ensure the smooth arrival of patients, with the help of the self-arrival system available at Medio, the patient can carry out the arrival process himself, thereby significantly reducing the time spent in queues and easing the work of the colleague performing administrative tasks.
To use the system, a device suitable for data entry (e.g. tablet) and active internet access are required.
The function discussed here is connected in series with the patient call system, about which HERE you can read more.
Setting up self check-in
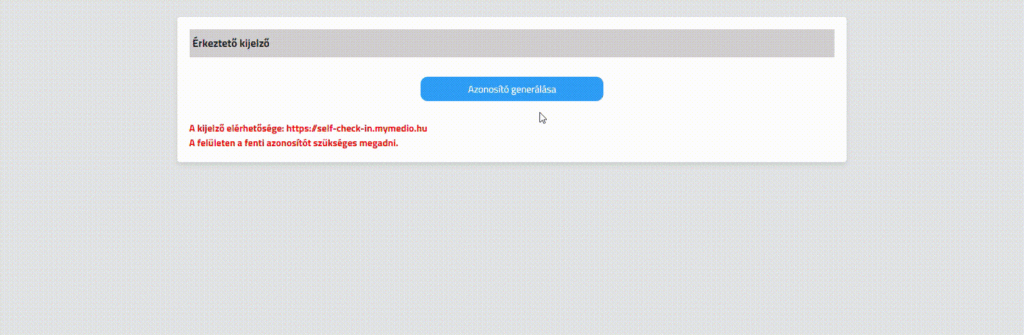
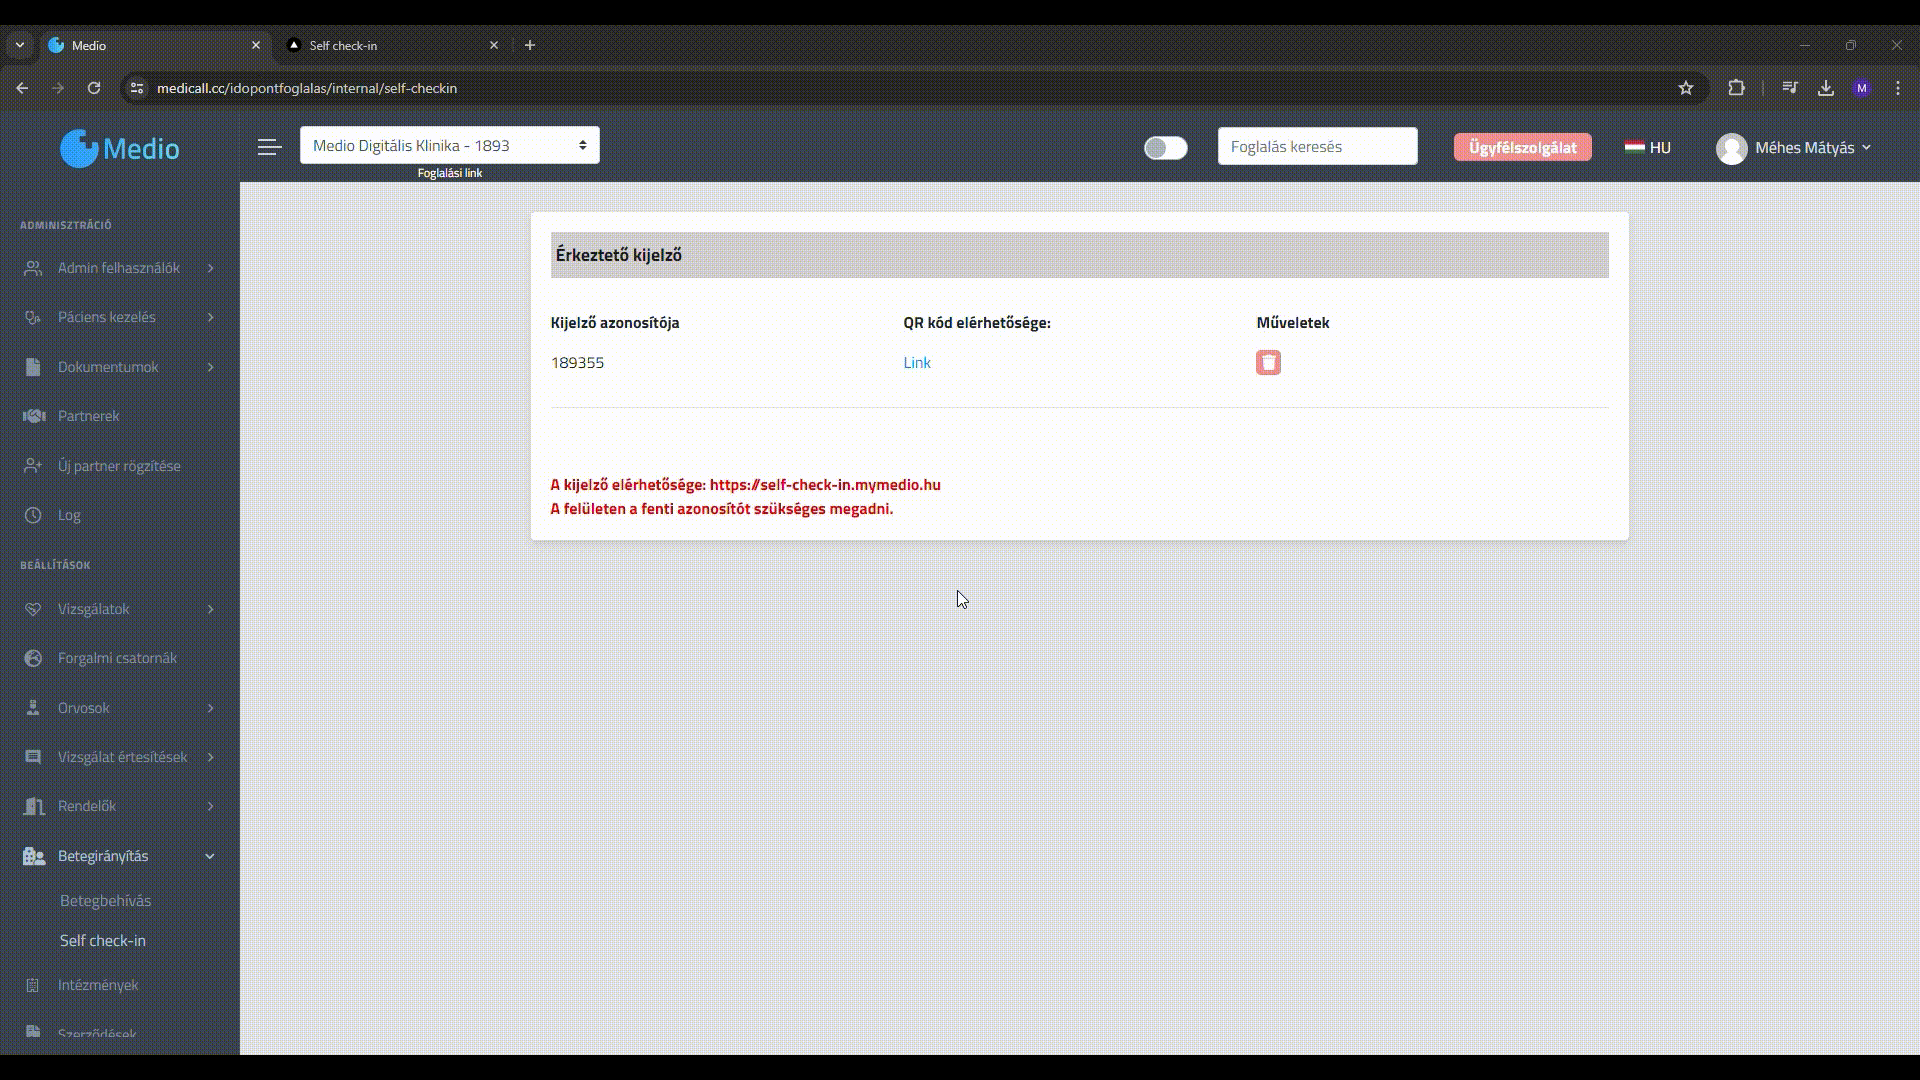
Generating an introductory display ID
The "Patient management -> Self check-in” menu item, it is necessary to generate the ID, which can be used to connect the incoming display to the Medio system.
The identifier cannot be changed, and in case of deletion, please note that the function will no longer work on displays previously set with this identifier until it is paired with another identifier
Set up a presenter on your device
On devices suitable for this, it is necessary to set the receiving page and connect it to the institution's identifier.
The corresponding link can be found under the display ID "Availability of the display” designation.
IMPORTANT: If we want to connect to the incoming display with a different identifier, to the icon of the institution By clicking 5 times we can log out of the system.
Self check-in operation
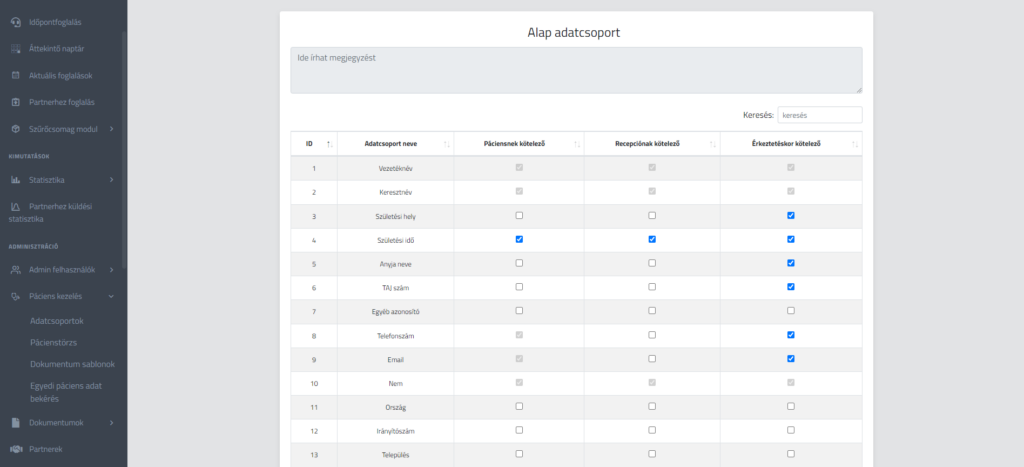
During the delivery, we have the option to request mandatory or optional data fields from the patient.
Select mandatory data
The data to be requested is selected in the "Patient treatment / Data groups" is possible under the menu item. The data group can determine, for example, whether a phone number or e-mail must be provided during the delivery.
IMPORTANT: The data entered during the reservation cannot be changed during self check-in, in such case you must contact the receptionist.
Self check-in from the institutional device
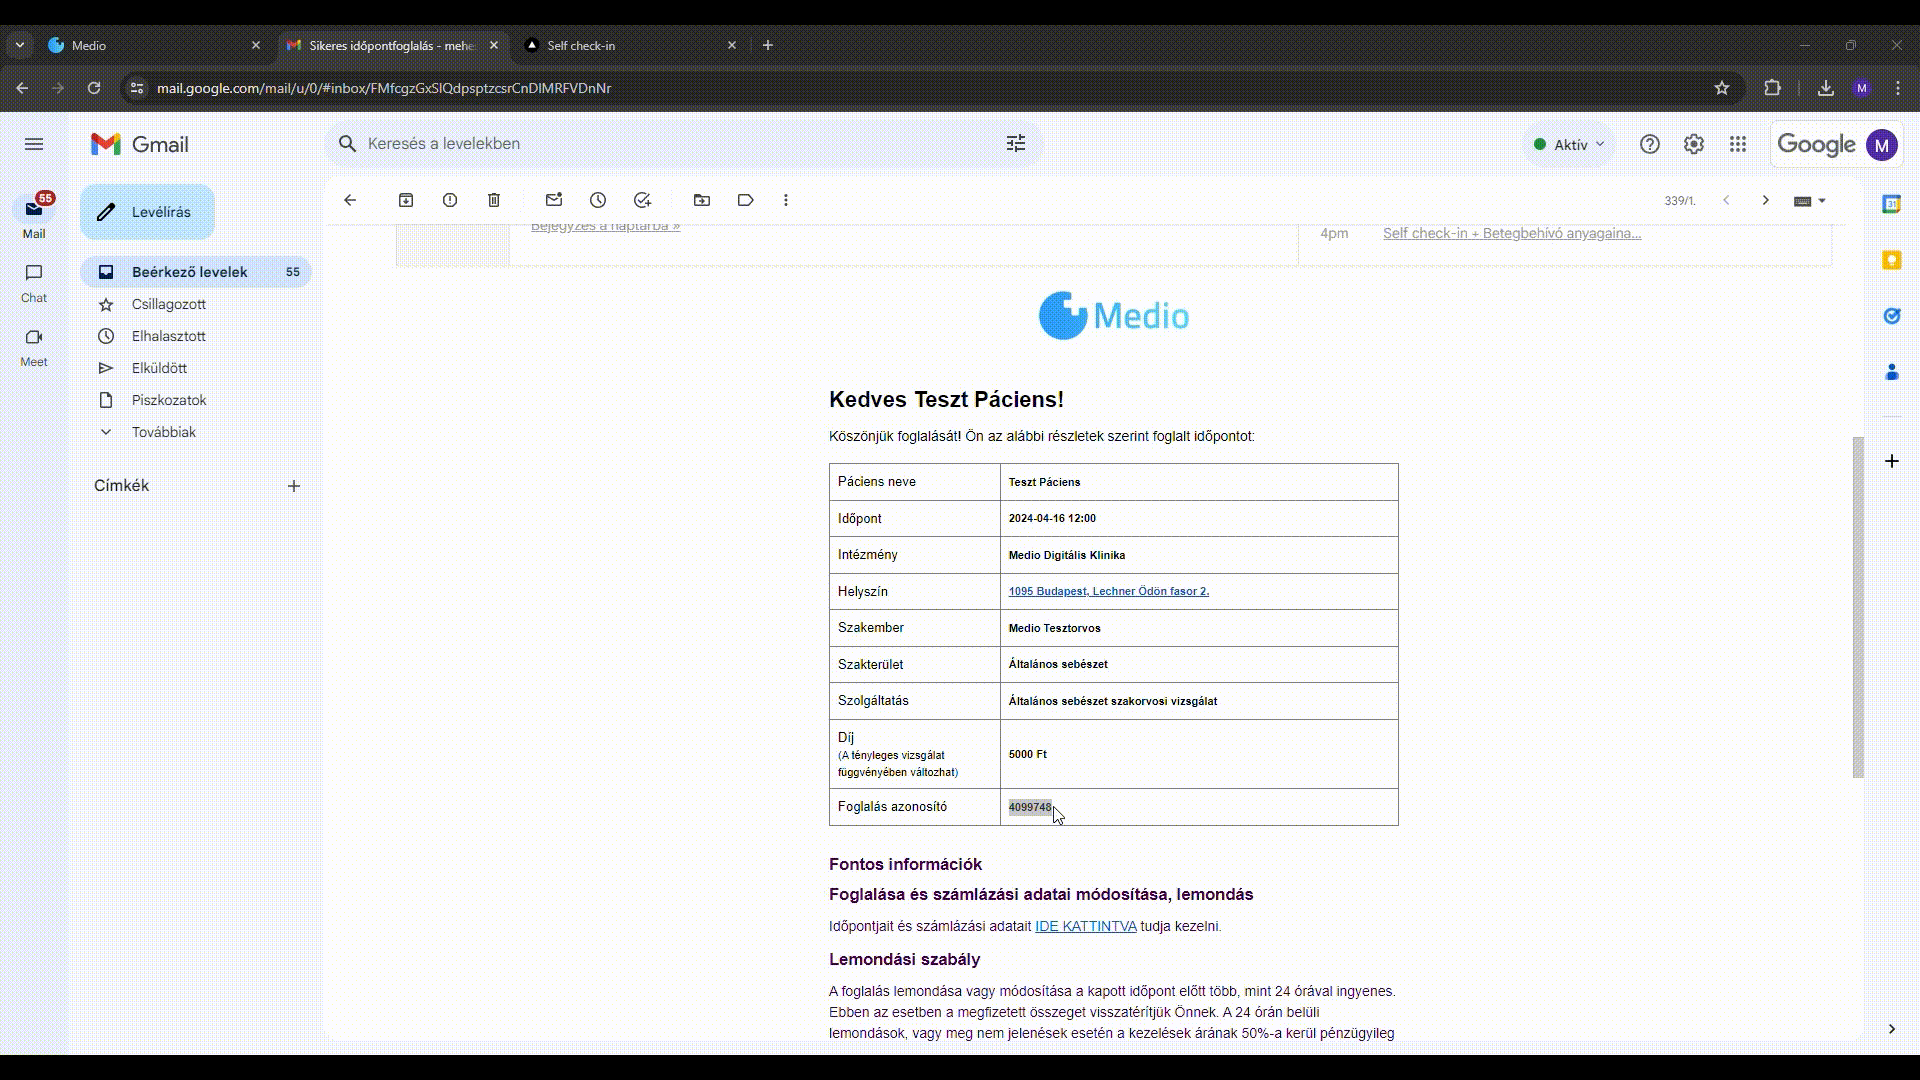
There is one in the confirmation e-mail following a successful booking concept ID, with the help of which the patient can start the arrival process upon arrival at the institution, entered on the arrival device.
The system recognizes an active reservation based on the reservation ID and the year of birth.
After a successful arrival, the call-in ID generated for the arrival will be displayed on the display, and then the arrival page will automatically return to its default position so that the next patient can also start the arrival.
In the event that the patient tries to complete the check-in again, the system automatically detects that the booking with the given ID was checked in earlier and writes out the call-in ID created for the call-in again.
IMPORTANT: If the automatically filled data is incorrect, by clicking on the "Incorrect data" button, a window will pop up telling the patient to contact the reception for help.
Self check-in from your own device using a QR code
The patient has the option to check in from his own device, if he is able to scan the QR code displayed in the institution. By scanning the QR code placed in the lobby of the institution with a smart device, the self-delivery interface opens, where the delivery can be made similarly to the delivery from the institutional device.
IMPORTANT: In order to ensure that no one arrives earlier than they arrive at the institution, it is worth placing the arrival QR code only inside the institution.
HELP
If you have any questions about the new function, please contact us at the following address: Open a customer service form