GENERAL DESCRIPTION
The proper management of the workforce is essential for the effective operation of a private health institution. In Medio, it is easy to manage exclusions to keep records of doctors' leave and time off, thereby reducing the administrative burden.
Create types of exclusions
Since holidays and other breaks can take many forms, you can freely create a reason for exclusion for each of them in Medio, which can be used to create exclusions in the future.
All this is Institution settings menu item.
Once the reason for exclusion has been added, you will still be able to edit it, or delete it from the system at any time.
How exclusions work
Exclusions are available in a separate menu, which can be found under Doctors -> Exclusions is located at.
This interface allows you to view existing exclusions, delete them if necessary, create new exclusions or export them so that the institution can keep them in manual form.
Create a new exclusion
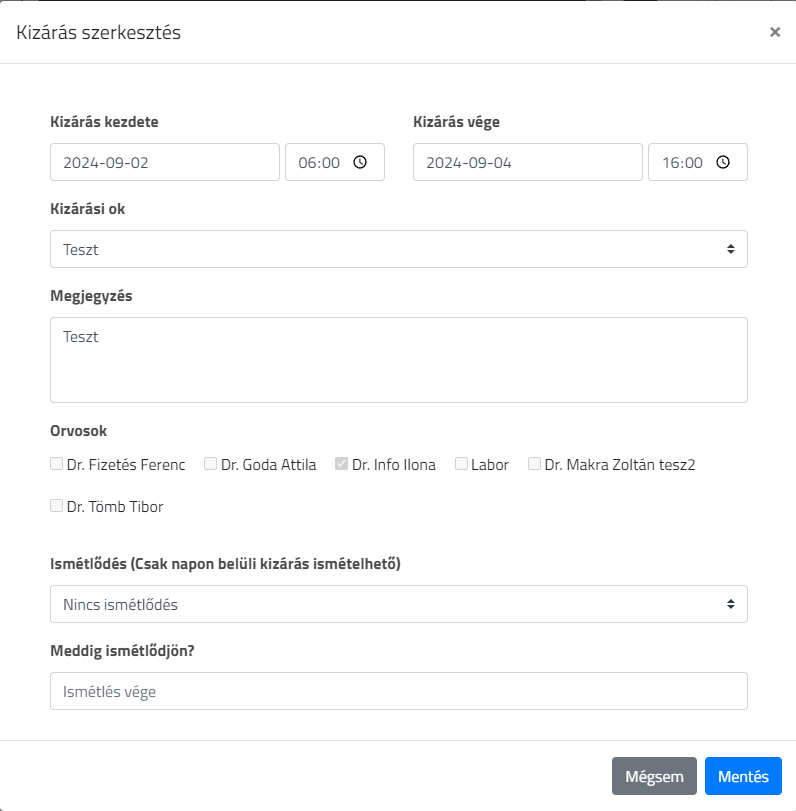
To add a new exclusion, use the "New exclusion" button.
After that, you can enter the exact details of the exclusion, which consist of:
- Start of exclusion and end of exclusion: from when and until when the exclusion will last (it is worth giving precise dates)
- Exclusion reason: You can choose from the previously created exclusion reasons.
- Comment
- Doctors: which doctors to add the exclusion. If the institution goes on full leave, you can assign all doctors to one exclusion.
- Recurrence: it is possible to create recurring exclusions that repeat on a daily, weekly, monthly basis (it may be advantageous to include a lunch break).
- How long to repeat: How long to repeat by date.
The example below illustrates how an exclusion appears in reality:
Create an exclusion:
In the overview calendar, the start date of the exclusion:
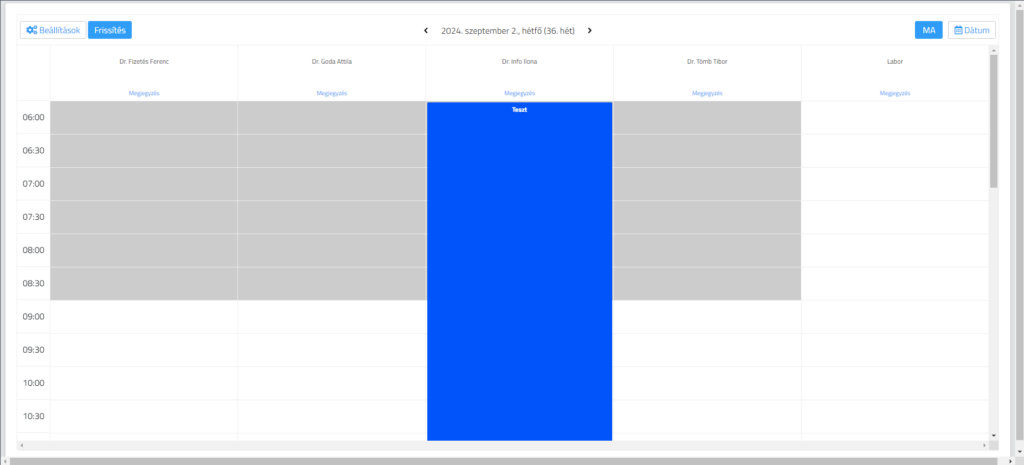
IMPORTANT: The colour of the exclusion depends on what was selected when the reason for exclusion was created. This can be changed at any time in the institution settings.
Edit, delete, and export files
All exclusions as mentioned earlier can be viewed under "Exclusions".
Exclusions can be edited at any time by clicking on the edit button:
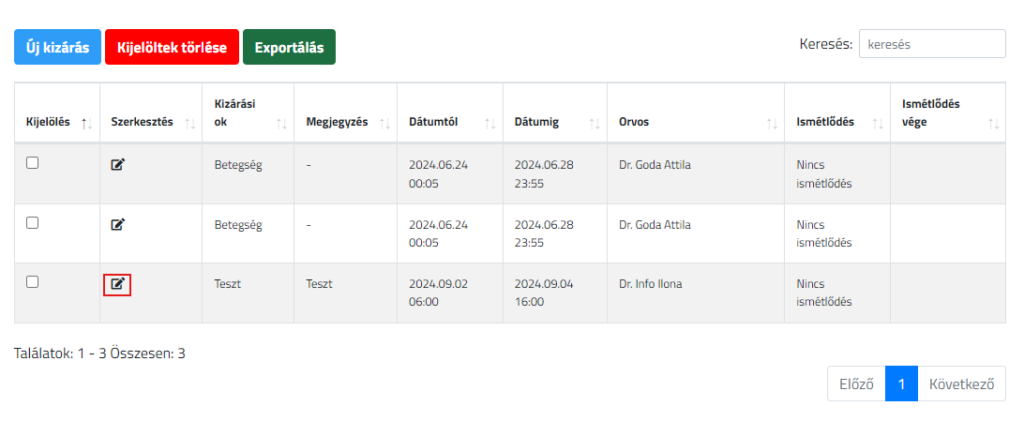
You can also delete them in the same interface. After selecting the exclusions you want to delete (ticking the check-box), click on the "Delete selected persons" button to delete them.
Furthermore, an export option is provided which saves all exclusions in an excel file. This is the green "Exporting" button.
HELP
If you have any questions about the new function, please contact us at the following address: Open a customer service form