GENERAL DESCRIPTION
Our revamped lab module makes lab test management more efficient: it allows easy authorisation of lab items, pricing, creation of test packages, and management of the entire process of sample collection and lab result management through Medio.
The HL7 communication protocol ensures fast and secure reception of results from laboratory service providers. The innovations are designed to increase efficiency and improve patient service by taking the administrative burden of running a lab off the shoulders of our partners.
Admin settings
The following are the settings needed to configure the lab and lab elements.
Authorisation and pricing of laboratory items
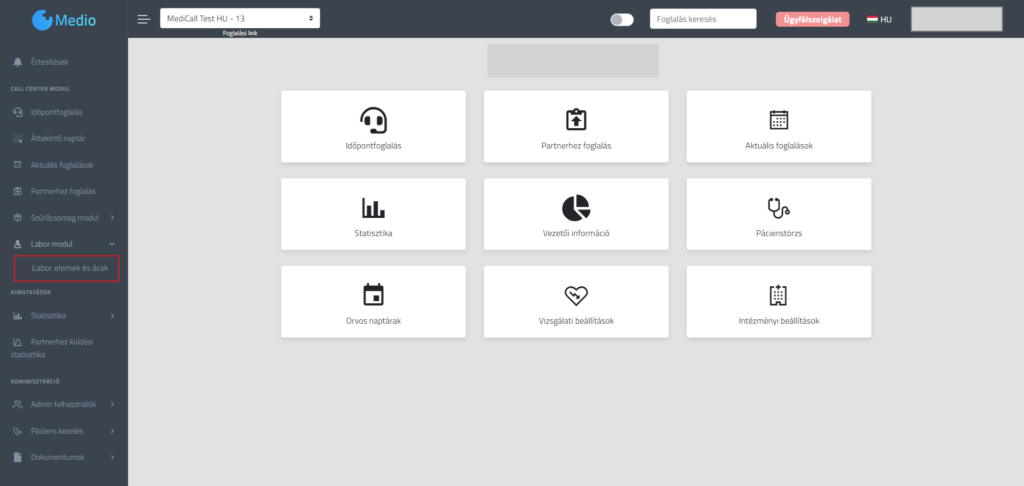
The Lab module -> Lab items and prices menu, you must first select the lab list you want to use.
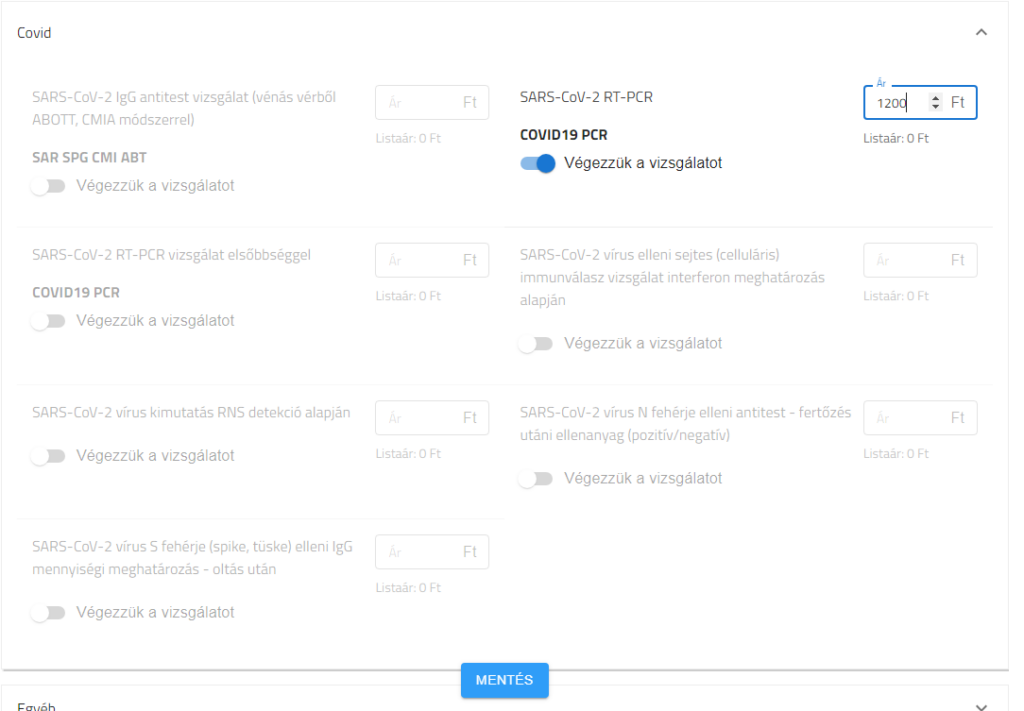
The laboratory elements for which the reservation is to be authorised must then be identified.
IMPORTANT: These are the elements that can be used to build lab kits in the test setup.
It is recommended to create a "Custom Sampling" study, which only includes the sampling fee, so that lab items can be selected individually during the booking process, according to your own preferences.
For the lab items marked, it is important to set the prices to be published to patients. To do this, we recommend using the "Show only active items" filter.
Finally, click on the "Save" button at the bottom of the screen.
Test settings
The Tests -> Add new test menu, you must first select the type of test, which in this case is "Laboratory". The type of laboratory, which is the laboratory provider, must then be entered.
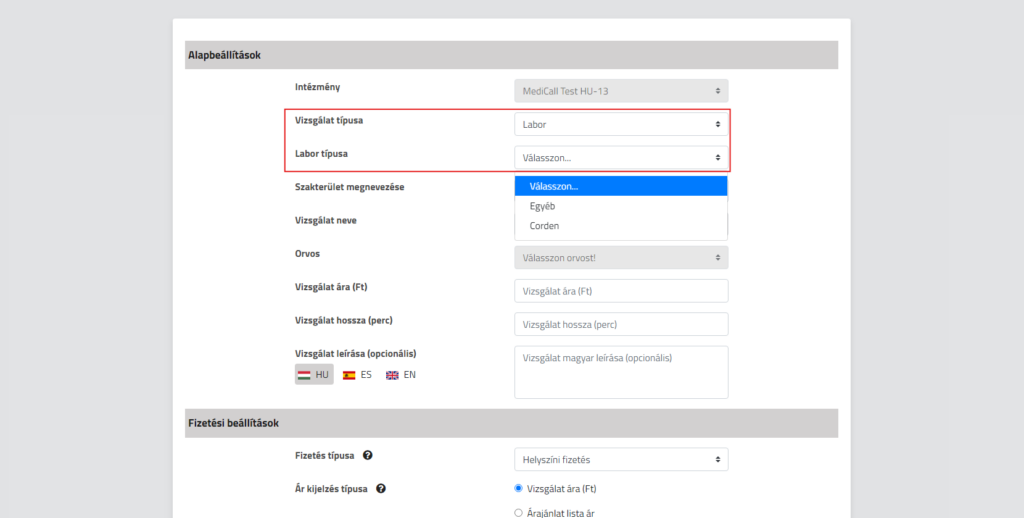
Next, the lab items in the lab package need to be assorted. In the list only the items are those that have been enabled for that laboratory provider in the "Laboratory items and prices" menu.
IMPORTANT: It is also possible to enter the price of an individual lab package; if this field is left blank, the price of the lab package will be equal to the total value of the lab items.
Lab-type landings
The "Check-in" option (for receptionists) is available in any interface where reservations can be managed, such as the Appointment Booking, the Overview Calendar, the Current Reservations, or the Lab Module / Lab Arrivals interface.
Operation
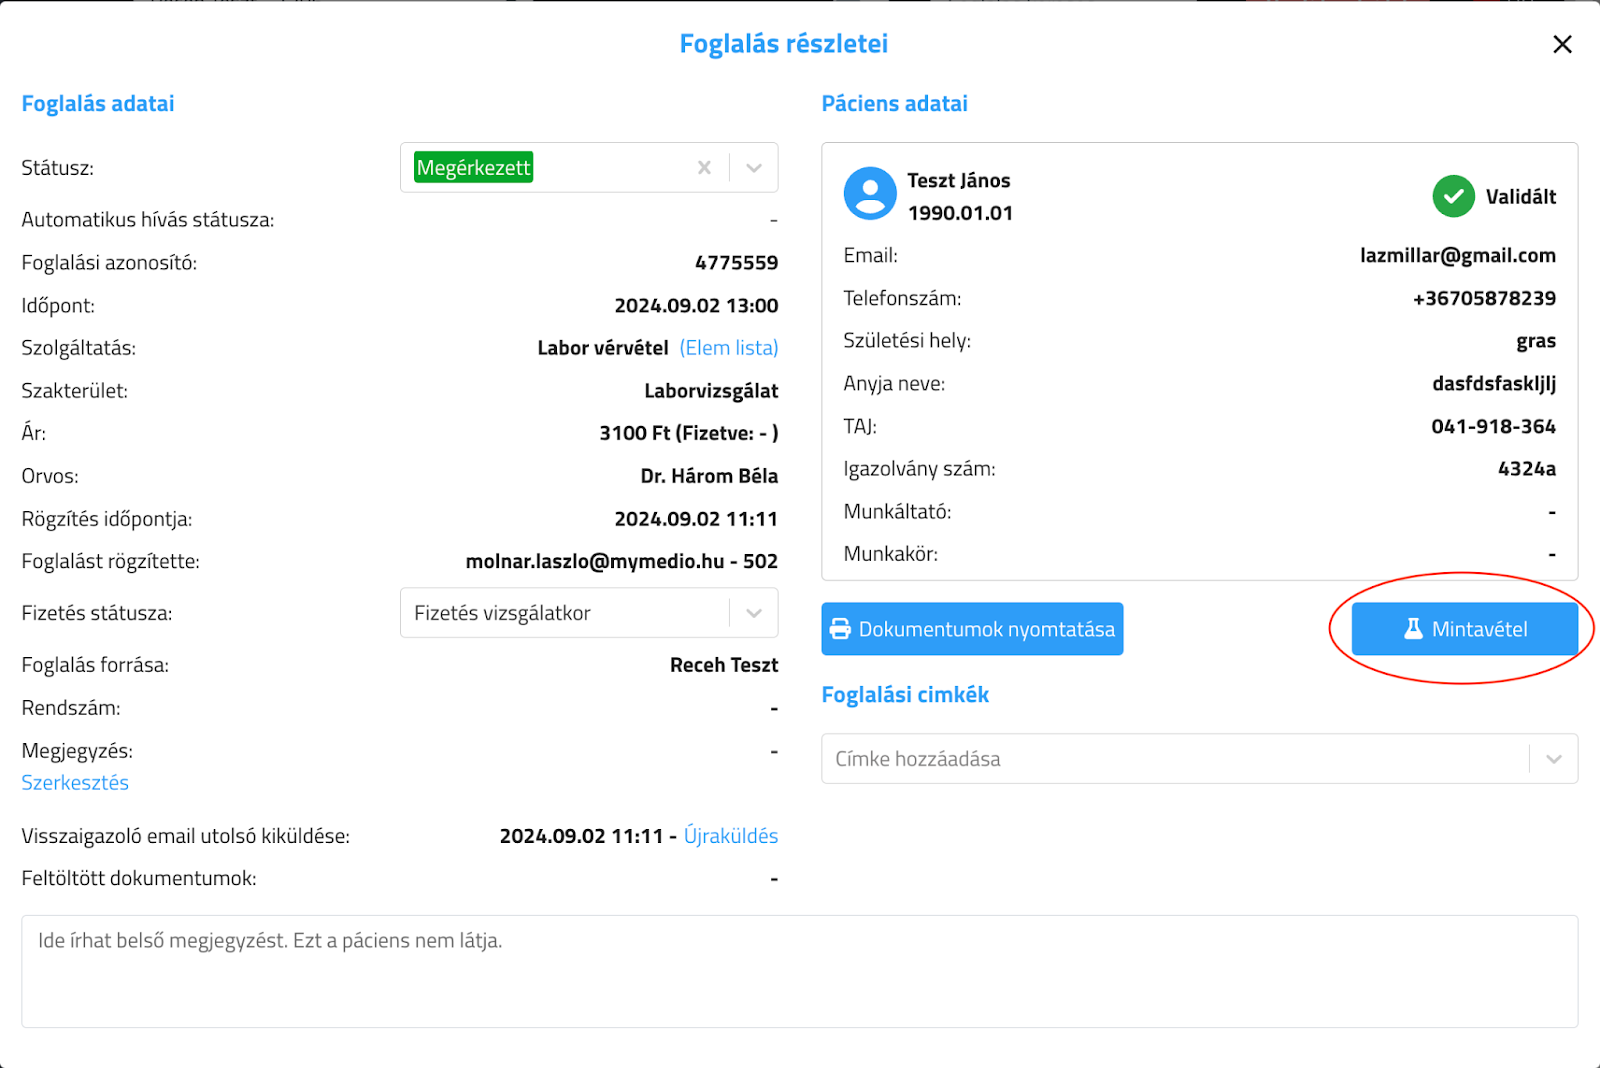
To start the check-in process, click on the "Check-in" button on the reservation card.
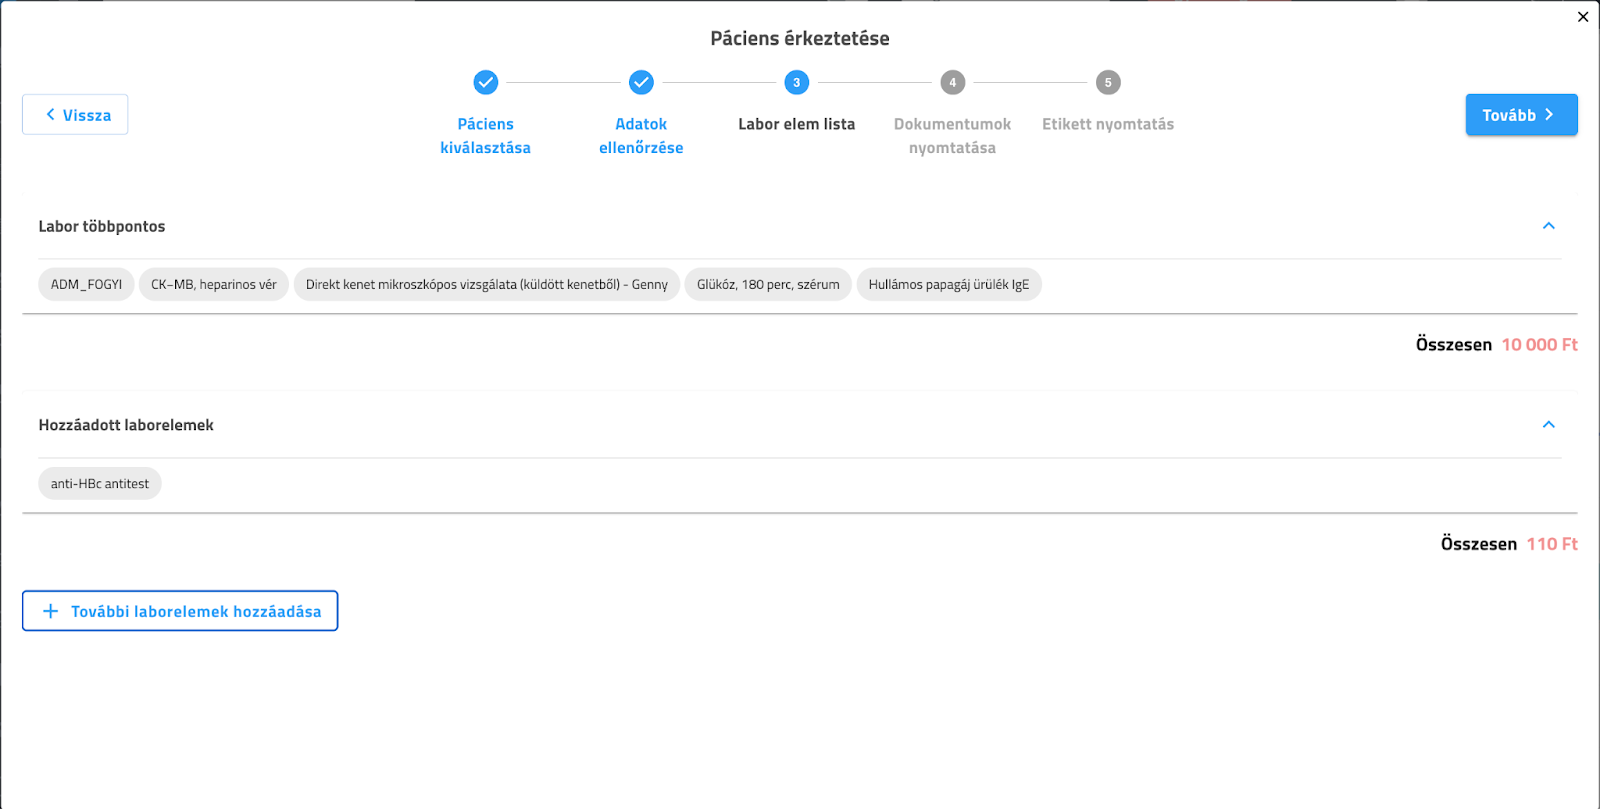
Laboratory type in the case of investigations, the landing process two a new element is added: a lab with item list and a label printing with the possibility of.
When selecting a patient, it is possible to create a new record or link the patient's data to an existing record as in all arrivals.
IMPORTANT: After the data has been checked and validated, the lab item list will be displayed, where you can click on the "Add more lab items" button to add more lab packages and items to your booking.
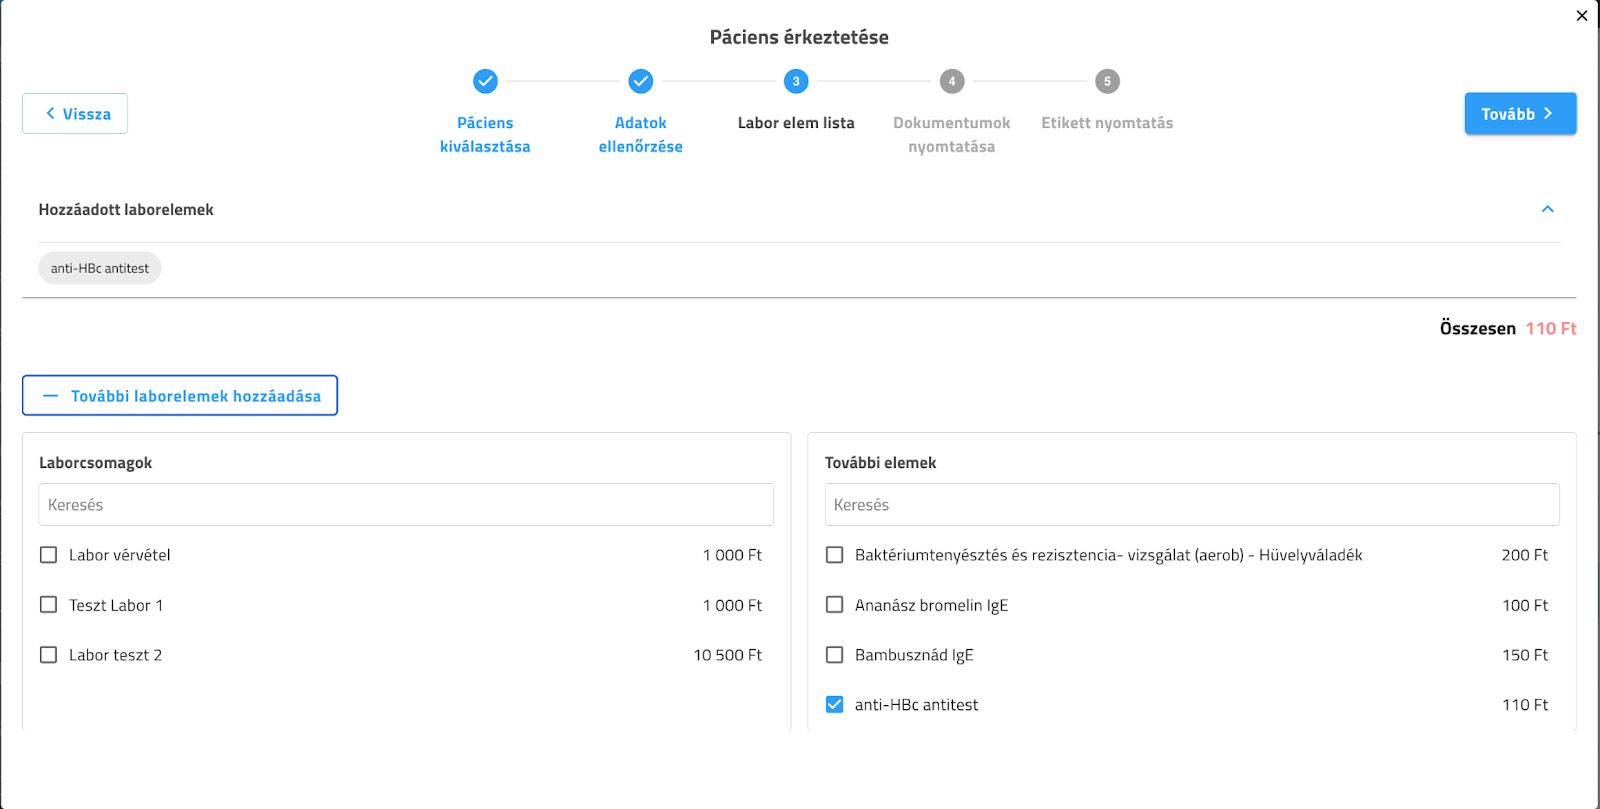
When selecting the lab packages to add, lab items are automatically selected, avoiding duplications.
Medio label printing printing of labels and barcodes to be applied to the sampling tubes. By clicking on the "Print" button, the labels are immediately printed on the label printer connected to the computer or device.
This step can be skipped if the labels are not printed at the reception.
It is important to note that sampling cannot be started until the patient has received the "Retrieved from" status.
Sampling process
The sampling process Lab module / Lab arrivals can be accessed under. In this menu item, you can see in chronological order the reservations of patients arriving to the lab on the same day, where the reservation type is "lab".
IMPORTANT: In the case of multi-point sampling, a reservation may include several dates.
Operation
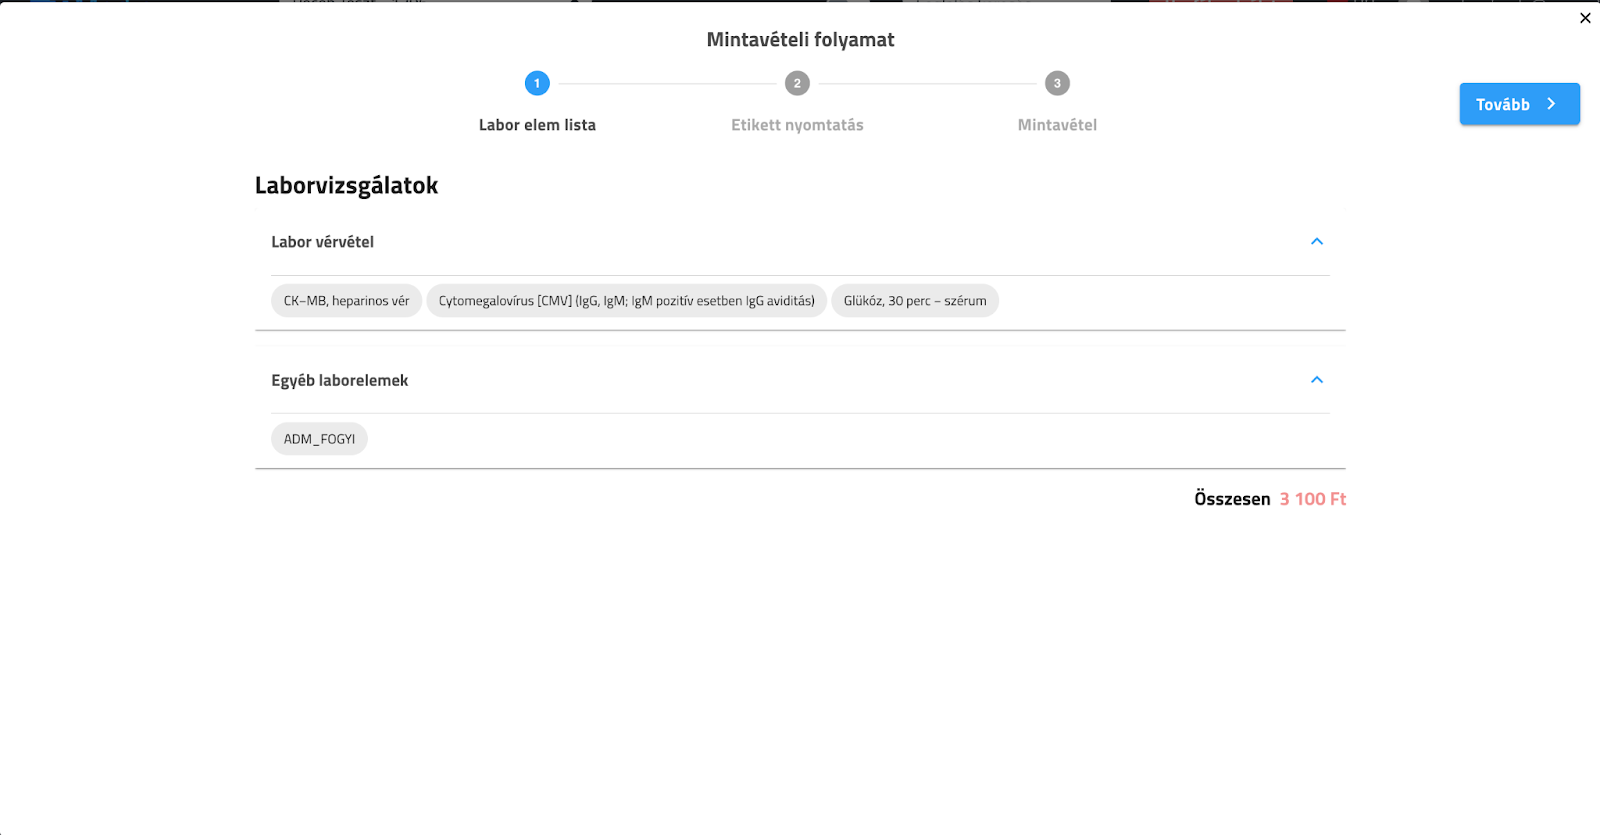
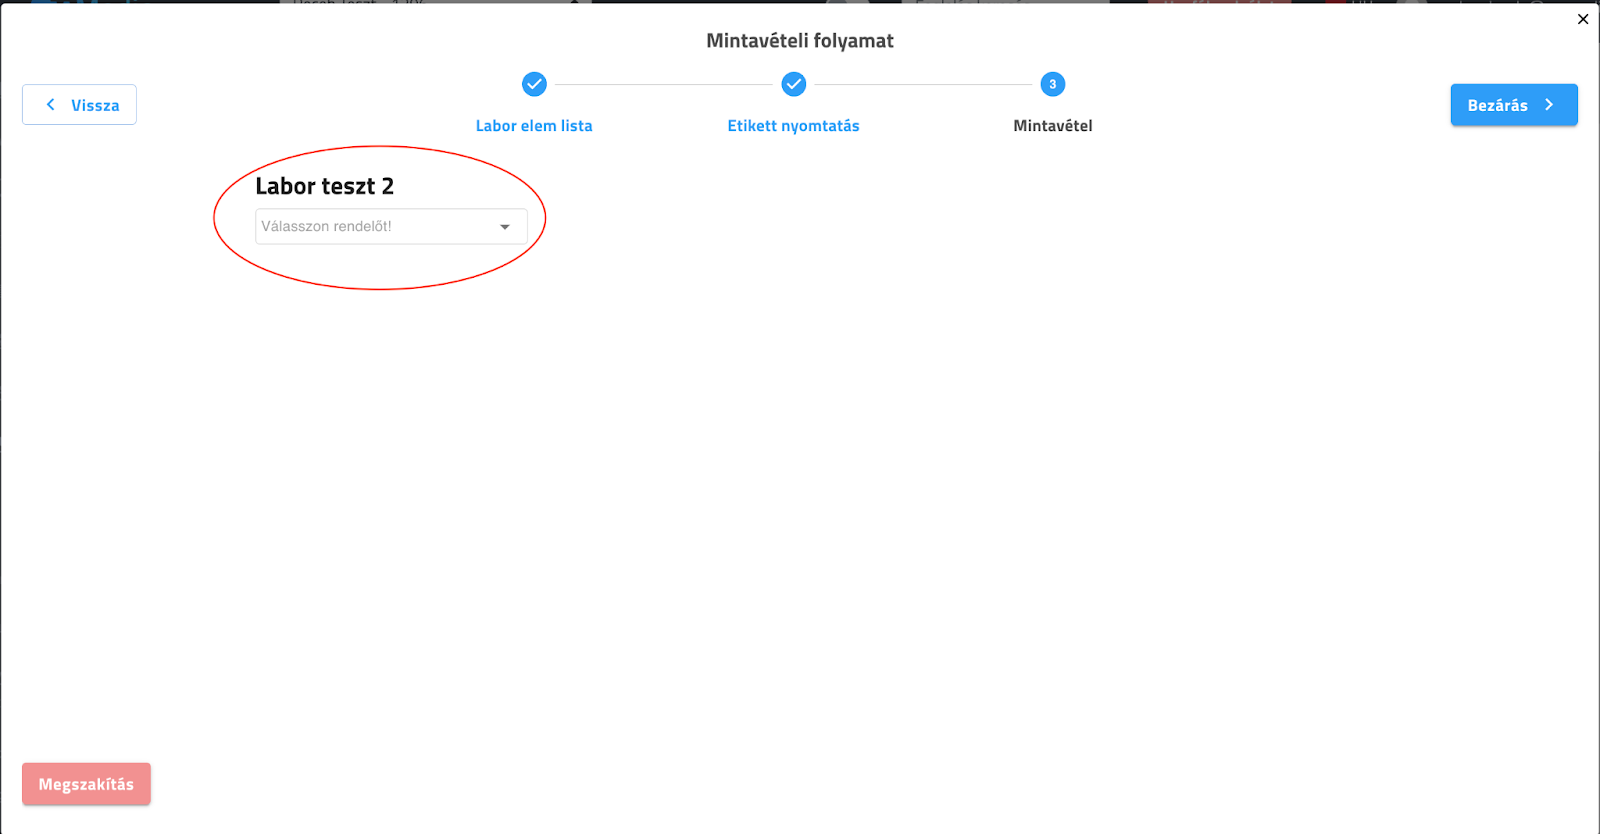
Clicking on the time will display the booking card and clicking on the "Sample" button will start the three-step sampling process.
The first step is the lab item list, which is used to overview the lab packages and items for your booking.
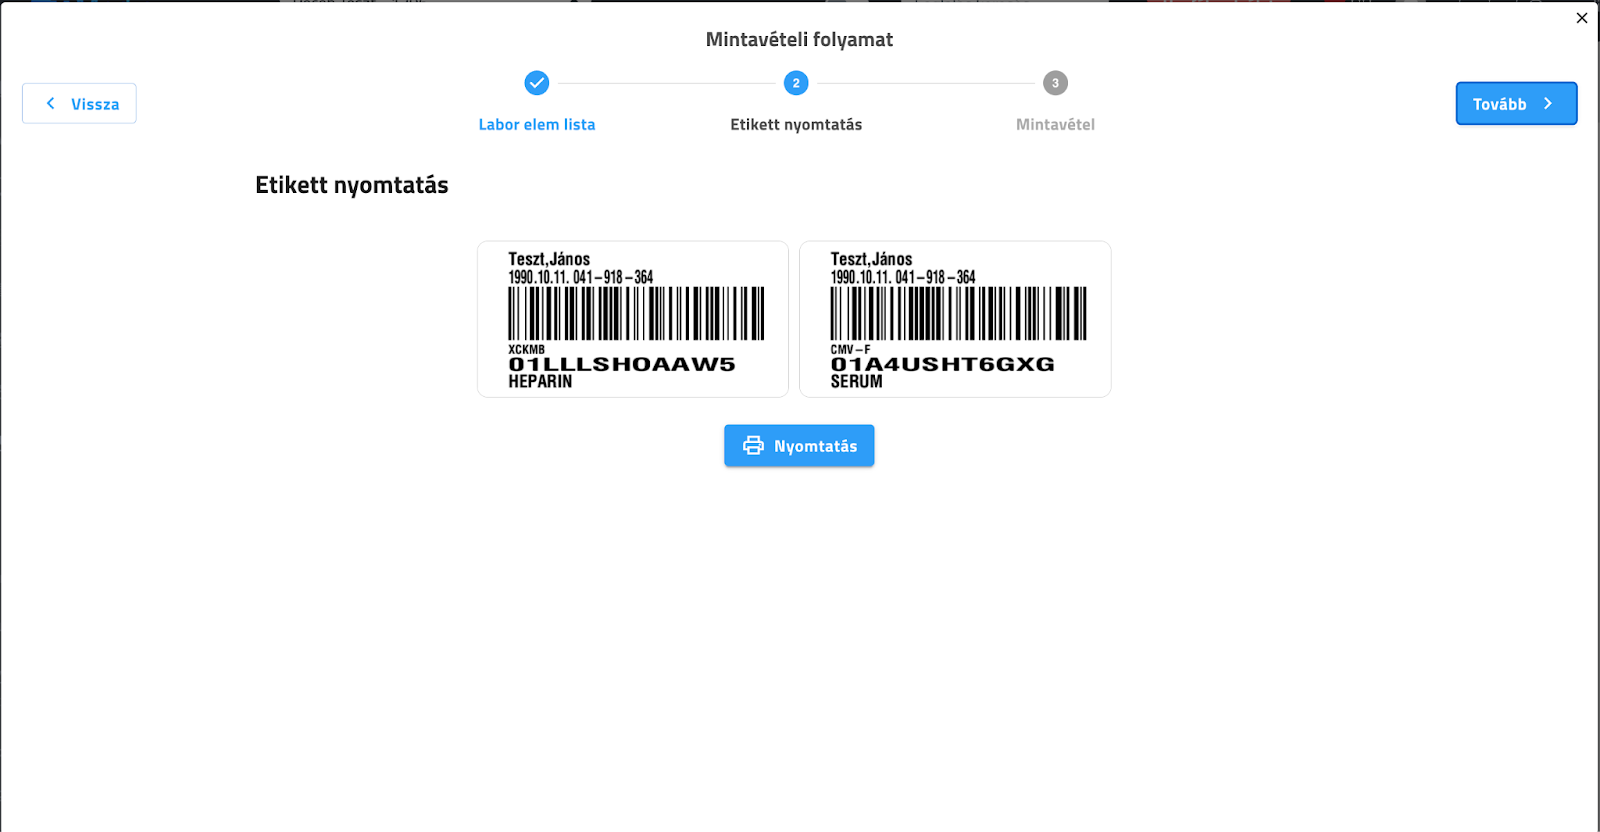
This is followed by label printing, which is the surface for printing labels and barcodes to be applied to the sampling tubes. Clicking on the "Print" button will immediately start printing labels to the label printer connected to the computer or device.
The third step in the sampling process is to select the sampling location, which is chosen from the list of practices created in the "Edit practices" menu. This choice is mandatory as it is essential when submitting data to the laboratory service provider.
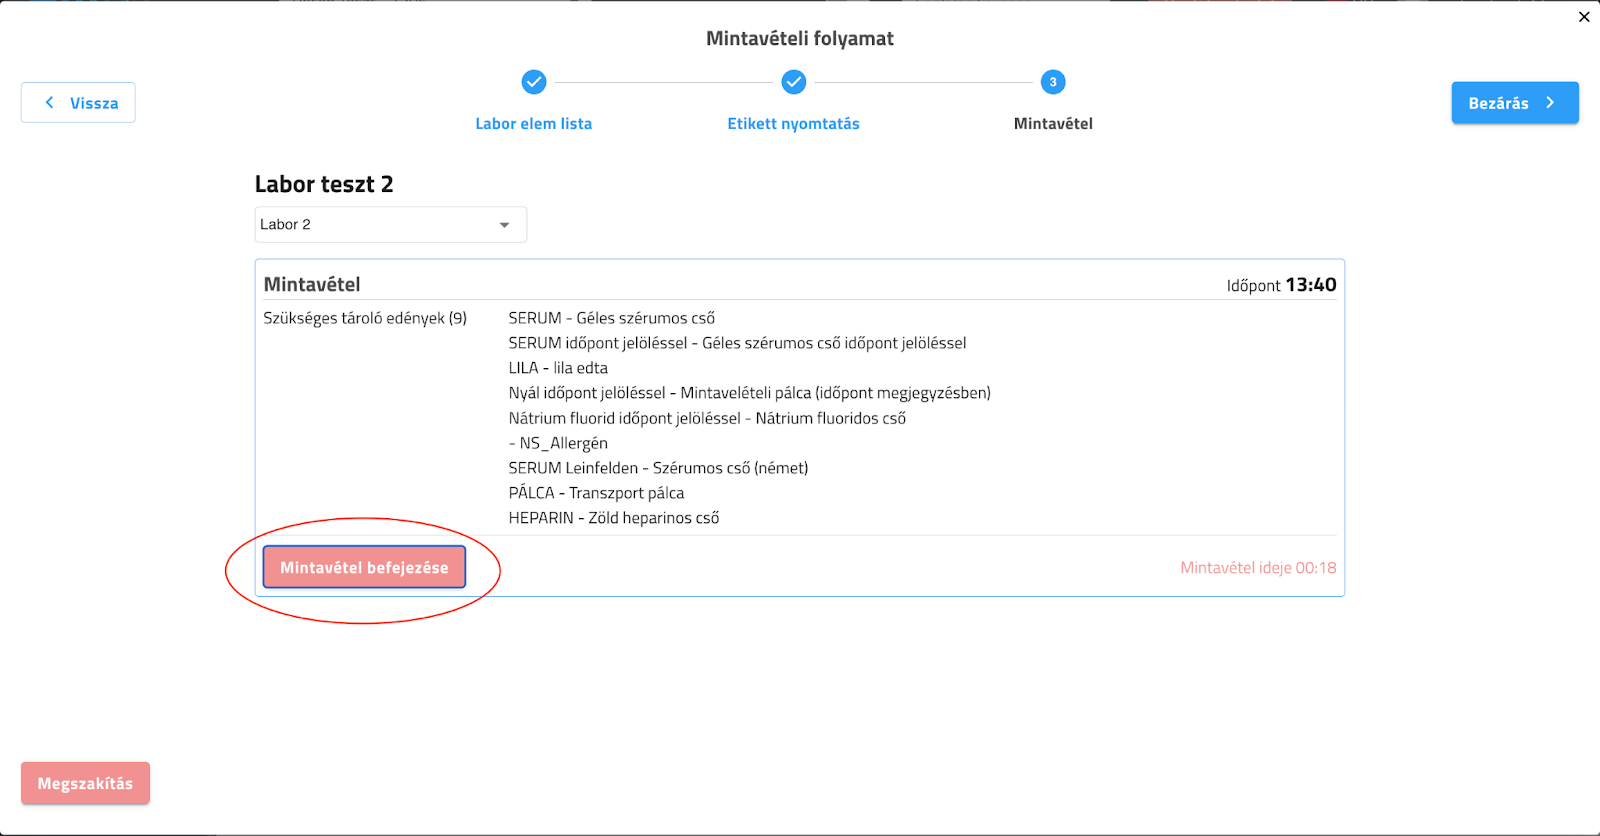
The storage containers to be used and required during the sampling are indicated for the given sampling date. A "Start sampling" button to start the sampling process.
Once sampling has started, a counter measures the length of the sampling, which lasts until the user clicks on the "End sampling" button. The sampling length is recorded and the data is also sent to the laboratory service provider.
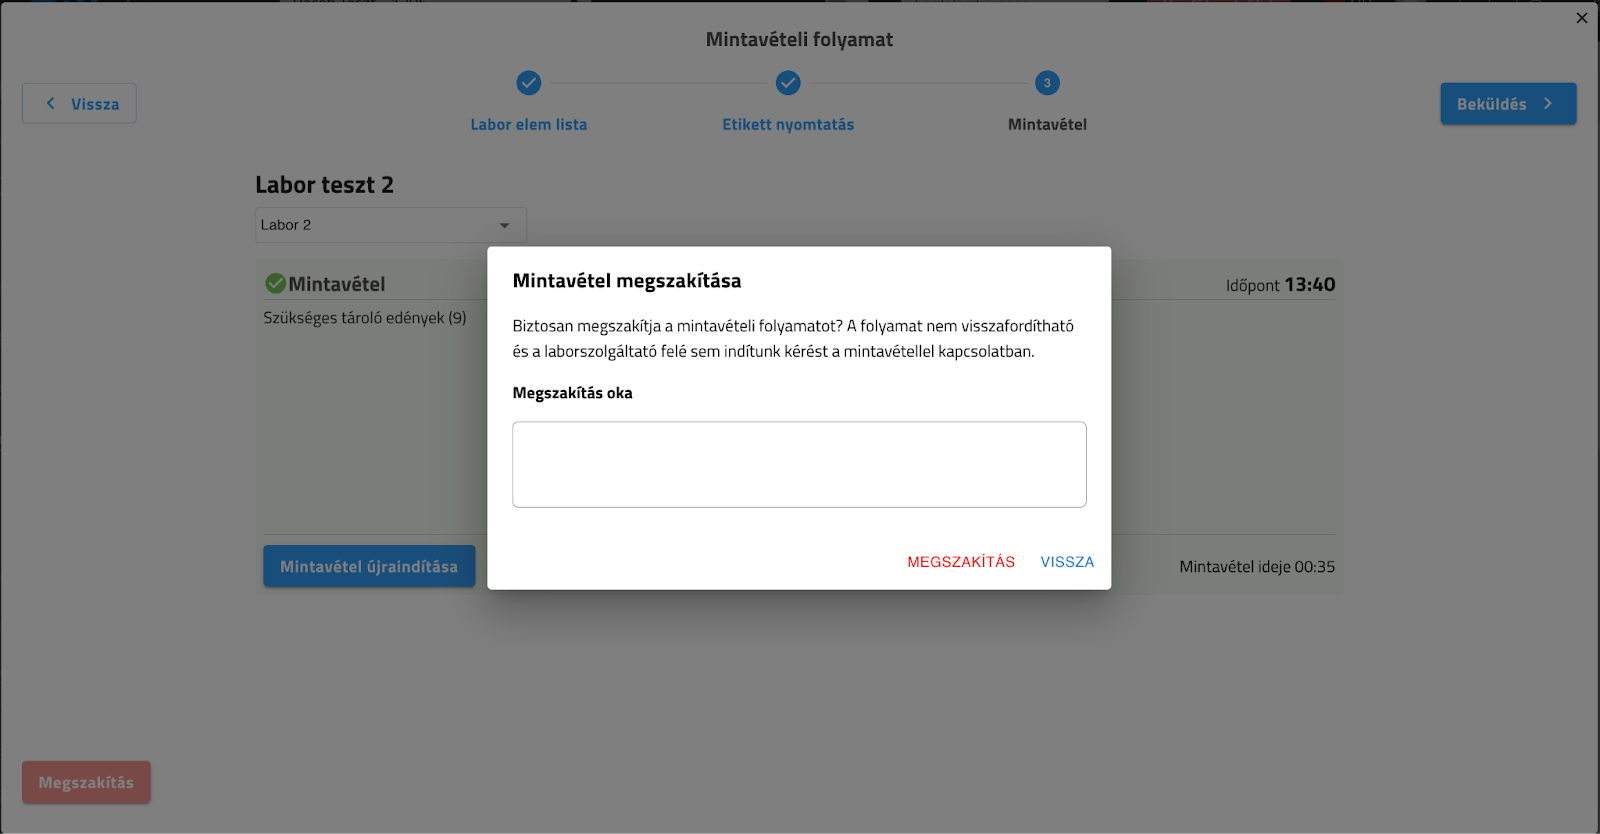
If necessary, use the "Disconnect" button, a window will pop up where you can enter the reason for stopping the sampling process in a free text field.
Clicking the "Cancel" button will permanently abort the process, so it is recommended to use it only in justified cases.
IMPORTANT: Cancelled samples are available in the "Incoming to the lab / Cancelled requests" menu.
In the case of multi-point sampling, the above process is repeated as often as the laboratory analysis warrants.
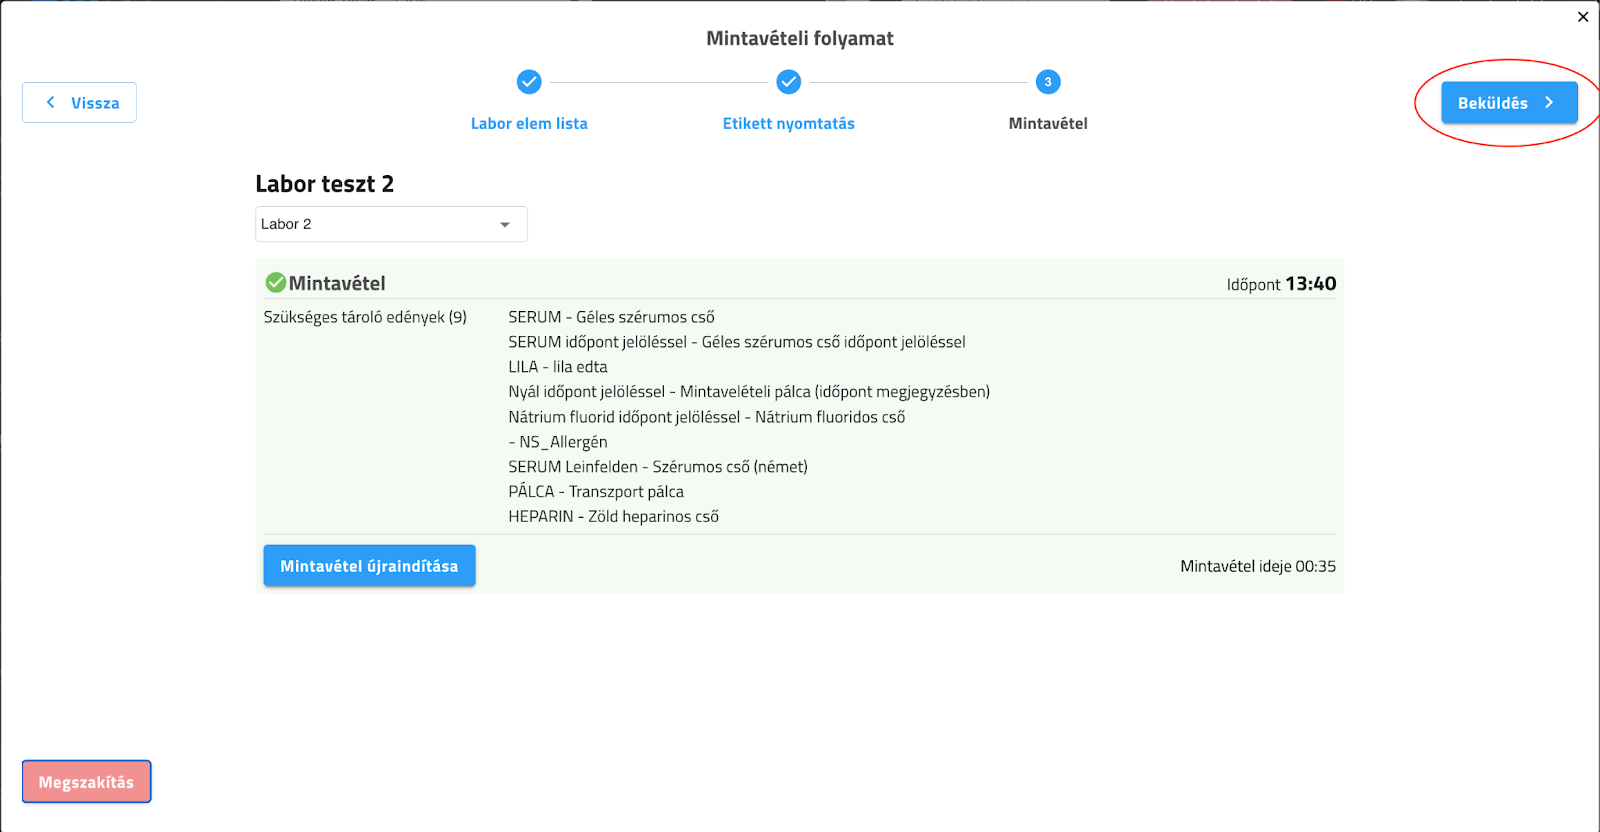
Before submitting a sample, all samples for the laboratory test must be taken and finalised.
By clicking on the "Submit" button, the sample request (including booking and patient data) will be sent to the laboratory service provider, thus completing the sampling process. The submission is done via HL7 communication, which guarantees maximum data security.
Lab results
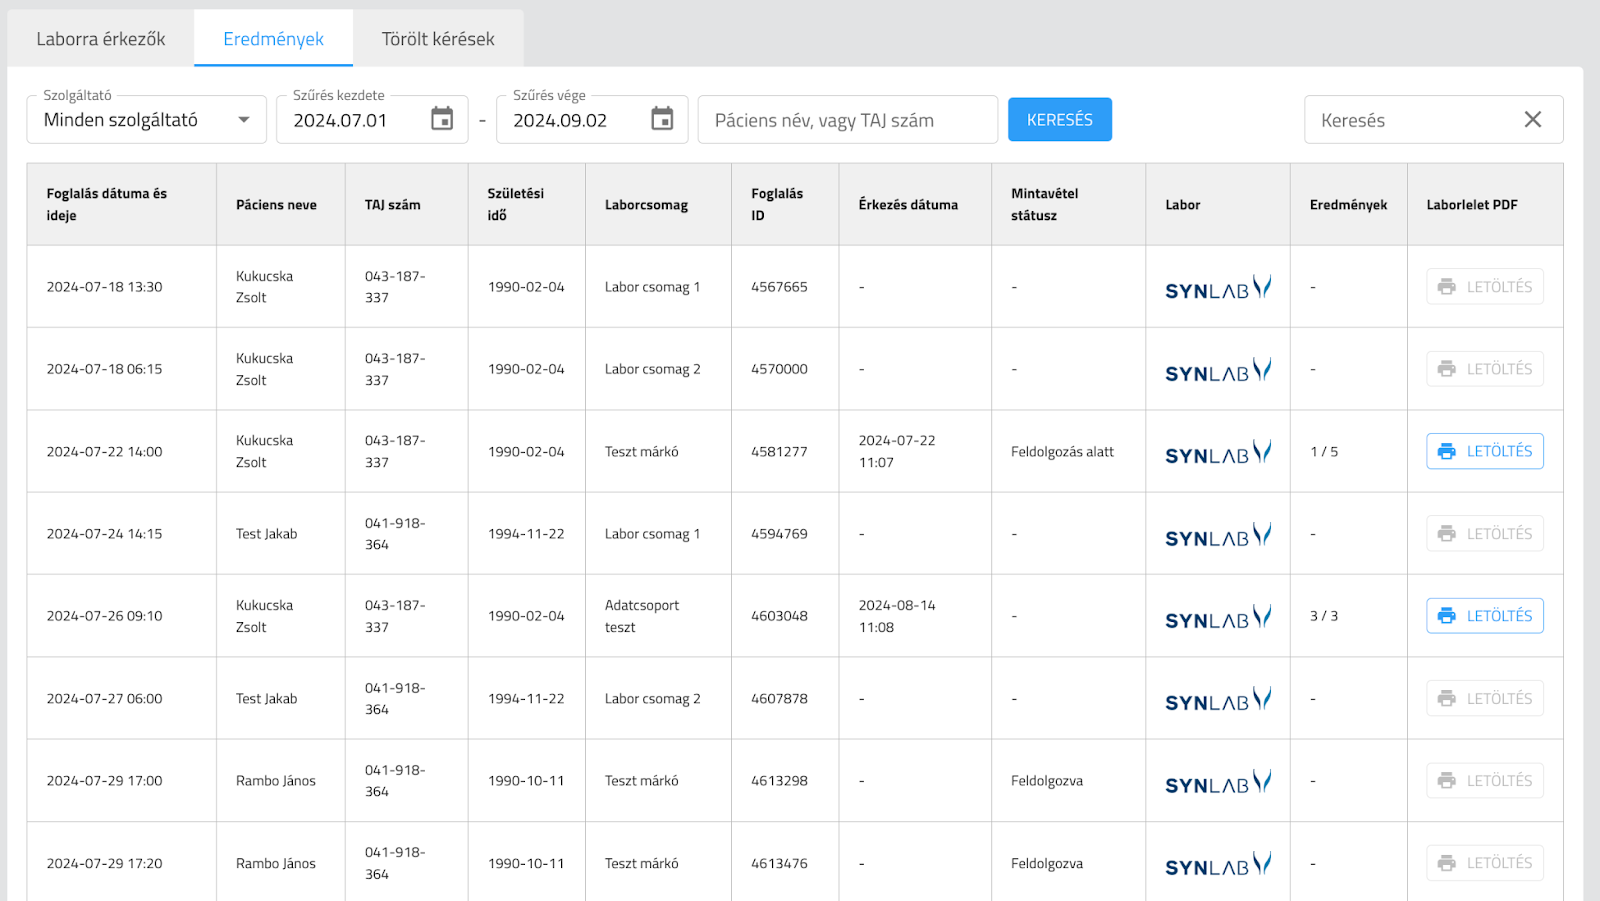
The lab results of the Lab module -> Lab arrivals -> Results (list of samples already completed and sent to the laboratory service provider).
To display the results, you can set a time interval or enter patient details in the search box and click on the "Search" button to get results that match the filter criteria.
In addition to the basic booking and patient data, the following values are included in the results:
- Date of arrival: indicates the date when the laboratory service provider last updated the content of the finding or result.
- Sampling status: the current status of the sample, e.g. "Processed", "Delivered to courier", etc.
- Laboratory: logo of the laboratory service provider.
- Results: indicates the sample processing status, e.g. "4/12", which means that 4 out of 12 items have been processed.
- Lab report PDF: the specific lab result is available in PDF format.
Deleted requests
Selecting "Cancelled requests" (Lab module / Lab inbox / Cancelled requests) will display the list of cancelled samples.
To display the list, you can set a time interval or enter patient details in the search box and click on the "Search" button to display results that match the filter criteria.
In addition to the basic booking and patient data, the reason for the cancellation and termination of the request is also indicated.
HELP
If you have any questions about the new function, please contact us at the following address: Open a customer service form